

EDUCATIONAL ELECTRIC MOTORS ASSEMBLY TUTORIALS
Windows/Mac version - PDF Format ©
Welcome to the Educational Electric Motors site! We’ve created four unique and exciting products to help students learn how to build real, fully functional electric motors. The four types are Toothpick, Straw, Paperclip, and Cork motors. Through this hands-on experience, students gain an understanding of the basic assembly and physics of an electric motor, including the key roles of electricity and magnetism. On average, the materials to build each motor for a class of 30 students cost about $40. All four motors can be built as a lab activity in an electricity unit or as a science project. The materials lists, guidelines, and step-by-step instructions are presented with clear text, engaging drawings, and high-quality digital photos. All tutorials are in PDF format and available for purchase on Teachers Pay Teachers.
Using text, drawings, digital images, and eye-catching animations, students are guided step-by-step through assembling each part of an electric motor. By following the sequence of instructions and pictures in each tutorial, they can be confident their motors will work. The tutorials also include tips on the best places online to buy wire for the coils and magnets.
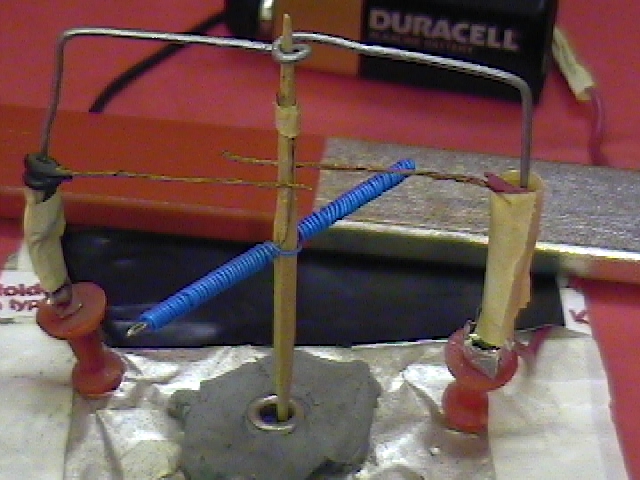
The picture above shows a Toothpick motor. As it can be observed, a steel needle penetrates the toothpick. A coil is built around the needle.
The coil is the key component of an electric motor, creating a fluctuating magnetic field as the motor spins. This educational product guides you step-by-step, with clear text and dozens of digital photos and drawings, through the entire process of making a coil from start to finish. By following the sequence of images, students can easily learn the skills needed to successfully create a working coil.


Science teachers can turn this into a fun, hands-on lab activity in electricity for the whole class. Using a large model, they can guide students in building the coil and other parts of an electric motor. If there’s access to a computer lab, students can simply follow the instructions displayed on the computers. Once all the materials are ready, it usually takes about 1 to 2 hours to assemble and successfully test a toothpick motor.

The animations of about 40 different motors are incorporated.

Another electric motor students can build is the Paperclip motor, the easiest of the four to make. It takes about 10 minutes to assemble, mostly spent making the coil. Students are encouraged to create several coils, each with 1 to 20 loops of wire, and then see which one spins the best. For smooth spinning, the insulation needs to be scraped in a specific way, as explained in the tutorial.
For this project, students need insulated wire between gauge 20 and gauge 30 to make the coil. Once the coil is made, a razor blade is used to scrape off some of the thin insulation layer. The coil is then held by two large uninsulated paper clips that have been reshaped, as shown in the picture above and the animation below. On top of the D-size battery sits a ring ceramic magnet. To power the motor, a D-size battery can be replaced with an old cell phone power supply and a small plastic bottle.
This product clearly outlines the materials needed to build the motor and where to find them. D-size batteries are widely available, while the wire and magnets can be purchased at Walmart, Home Depot, eBay, Amazon, and science supply stores. The rest of the materials—a rubber band, a cork, two large paper clips, and a small piece of cardboard—are commonly found at home. To cut the costs to $1 per motor, swap the D-size battery for a USB power supply from an old cell phone, which works great. Each product explains this process well.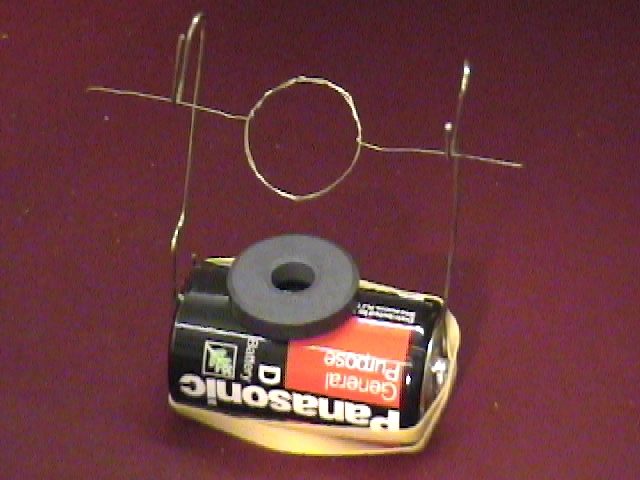

 ;
;
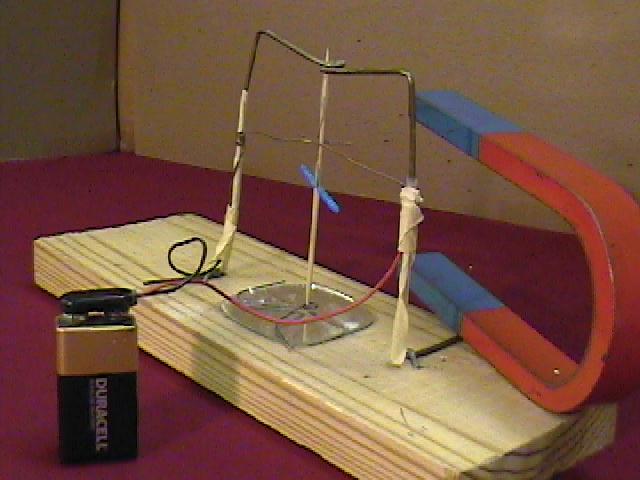
The straw motor is basically a bigger version of the toothpick motor. Instead of a toothpick and steel needle, it uses a plastic drinking straw and a straight steel wire, each about 12 cm long. A small paperclip wire works well for this project. It needs more electricity and a stronger magnet to run. Because it draws more current than a toothpick motor, you can power it with an old cellphone charger, a 9-volt battery, or a USB adapter. Putting it together and testing it usually takes about 1 to 2 hours.
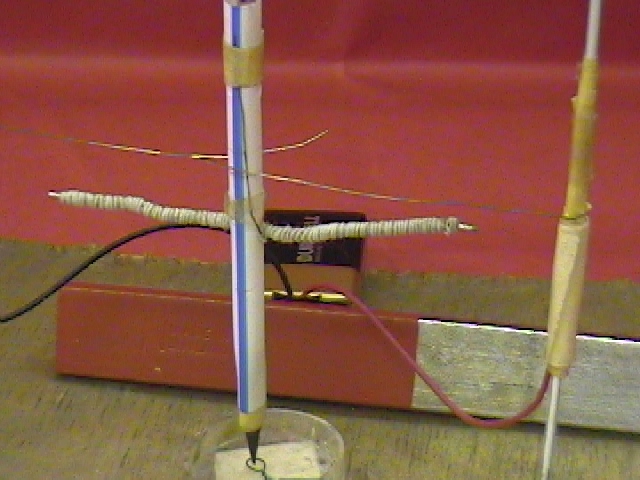
The core of this electric motor is a medium-sized cork. Among the four motors examined, the cork motor’s coil uses the most wire. It’s quite fascinating to watch it spin, and assembling it takes about two hours.


Note:
If you want to purchase any of the four electric motors turorials, please use the different links to Teachers Pay Teachers shown in this page.
Ceres Science
www.ceressoft.net
http://motors.ceressoft.net
Link to Teachers Pay Teachers
https://www.facebook.com/ceressoft
E-mail: science@ceressoft.net
Please click any of the links below to jump to different parts of our Web site: _